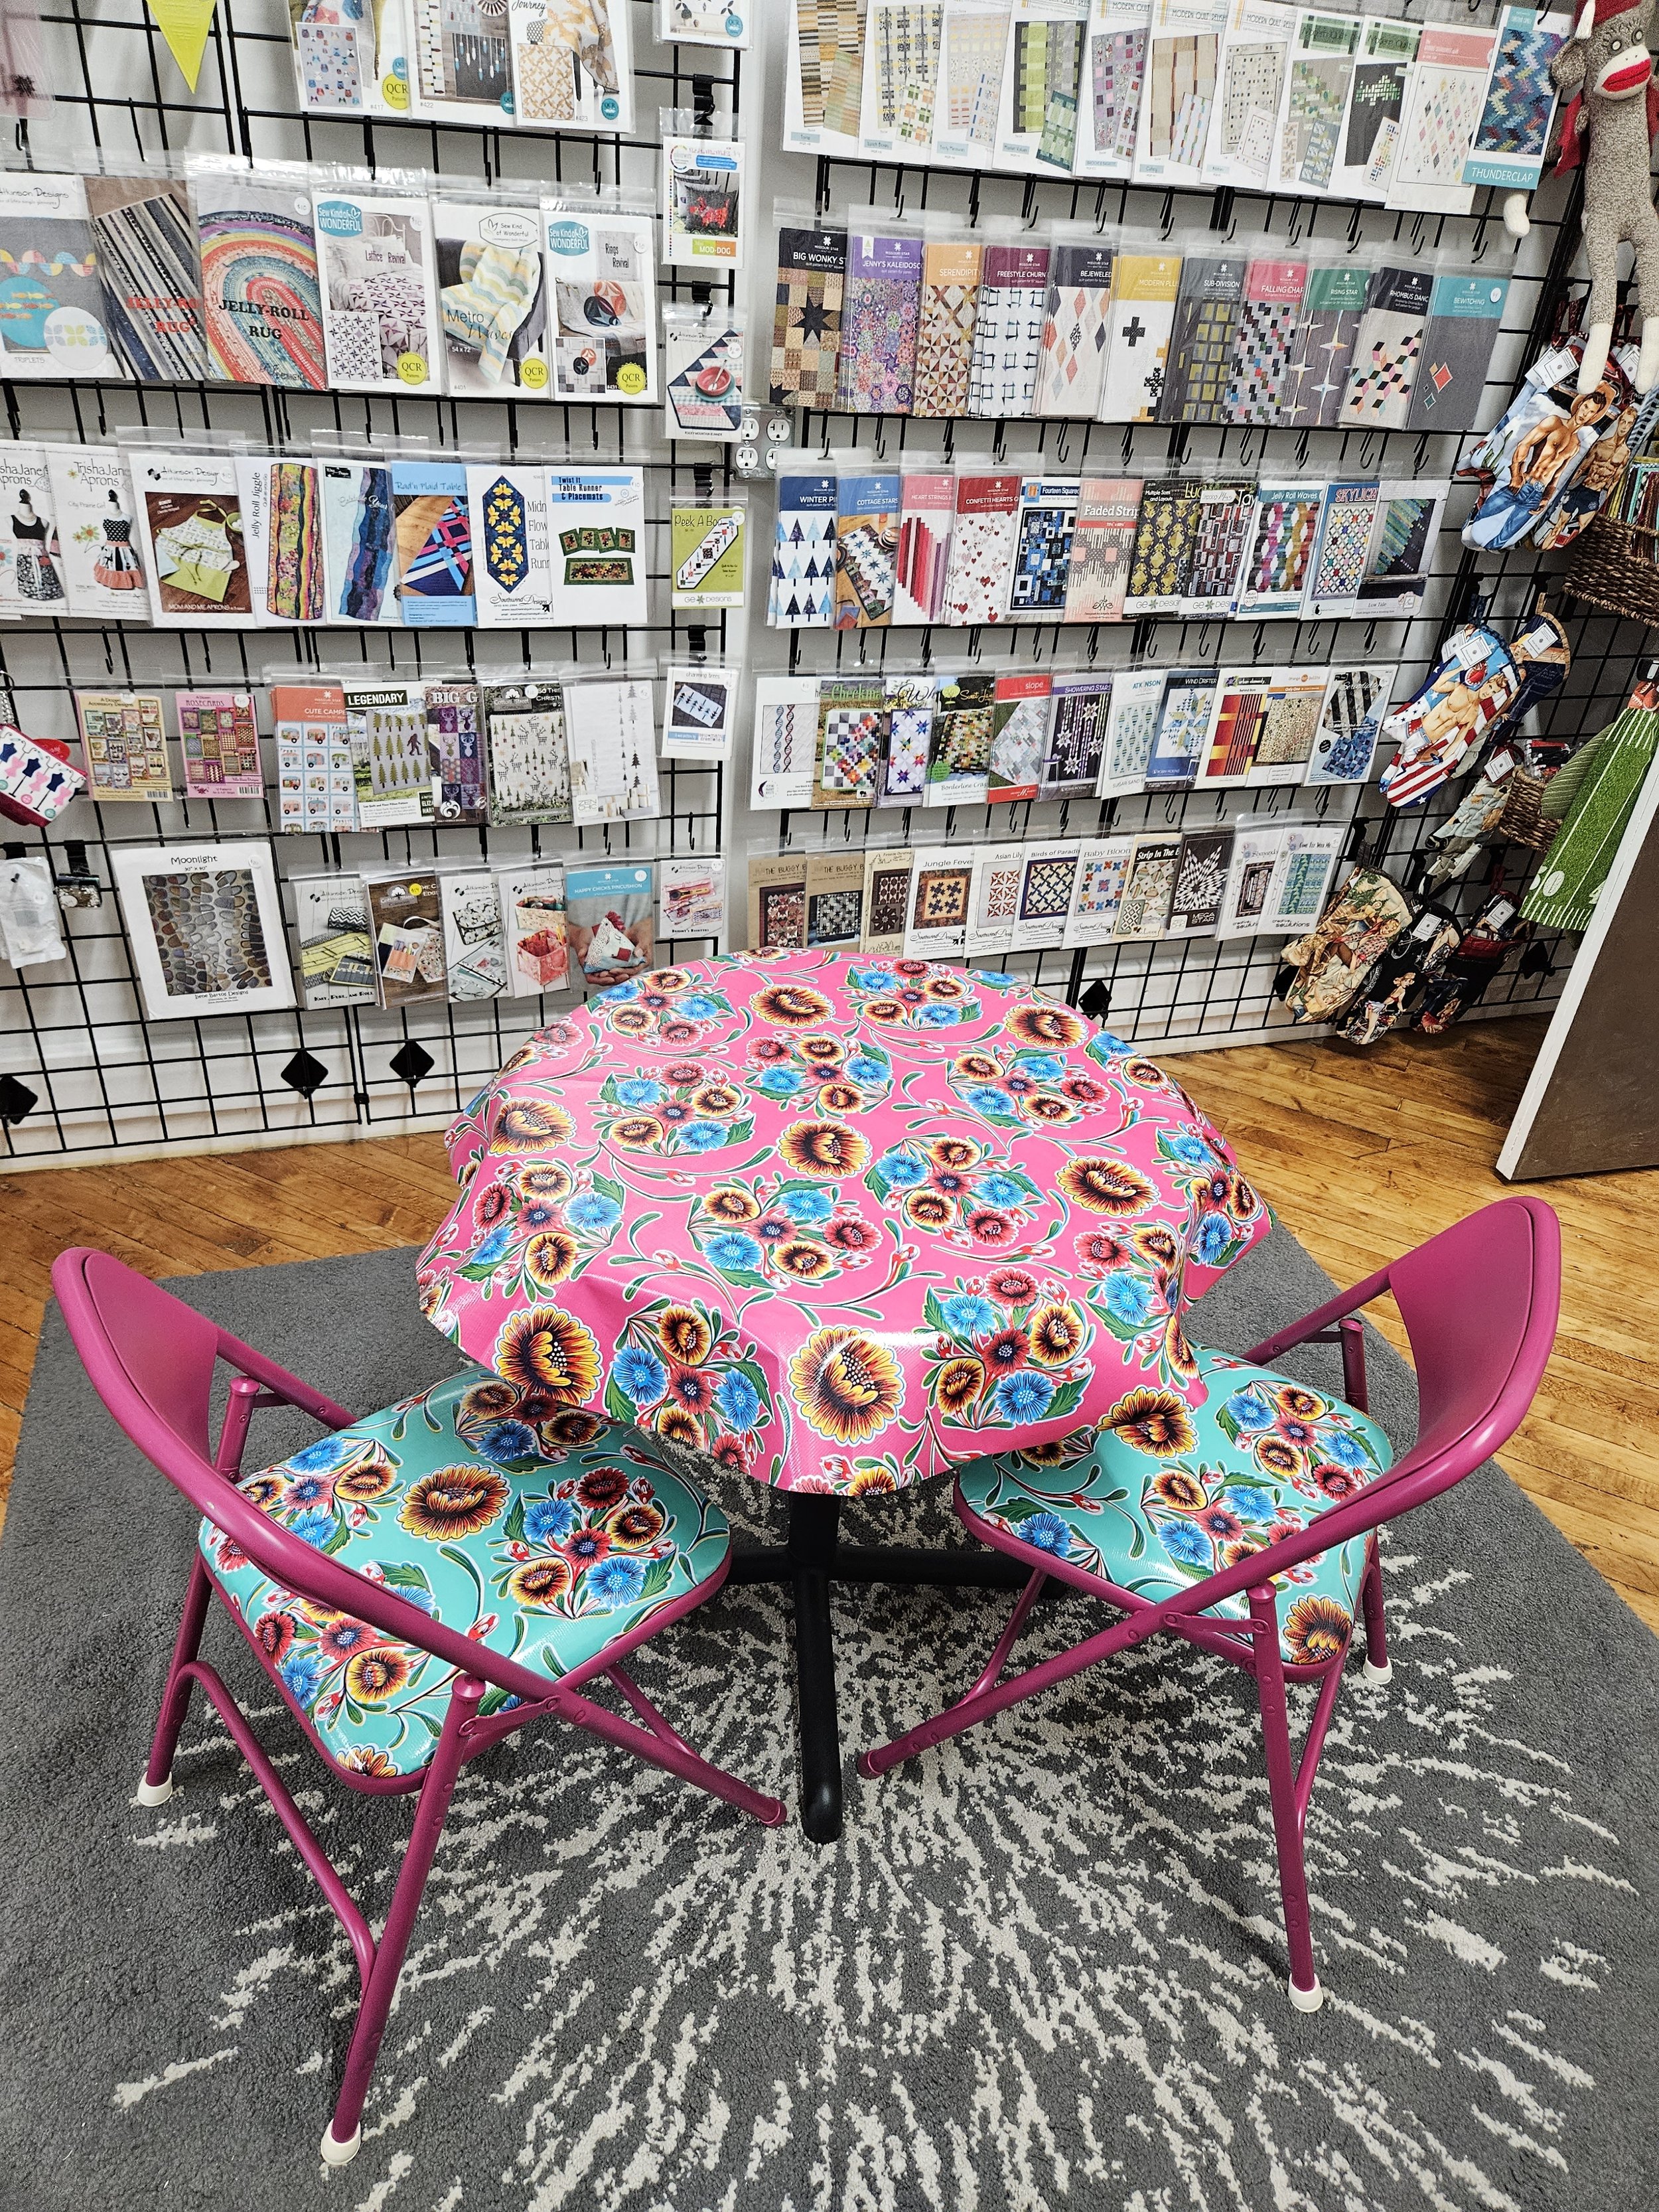
A Fun Oil Cloth Project
I needed two chairs for my new table at the studio, so today I rehabbed two card table chairs I found collecting dust in the basement. A little paint and some bright oil cloth and I didn’t have to buy two new chairs. See how I did it…

Today I made a fun and easy project from two old padded card table chairs that I found in the basement. These two chairs are at my studio now with a small table I purchased at IKEA last month. I also cut a 39” circle from a coordinating oilcloth for a tablecloth. Here’s how I did it.

Supplies Needed:
2 old padded card table chairs
2 cans Rust-Oleum 2X Ultra Cover Paint+ Primer (one can per chair) - I used Magenta Satin
2/3 yard of a bright colored oilcloth (1 yard if your chair has a padded backrest, mine didn’t)
Rubber Leg Tips (my chairs were missing two in back)
Staple Gun
Screwdriver or Wrench to remove covered seat (and back rest if your chairs have one)
Scissors
Drop Cloth
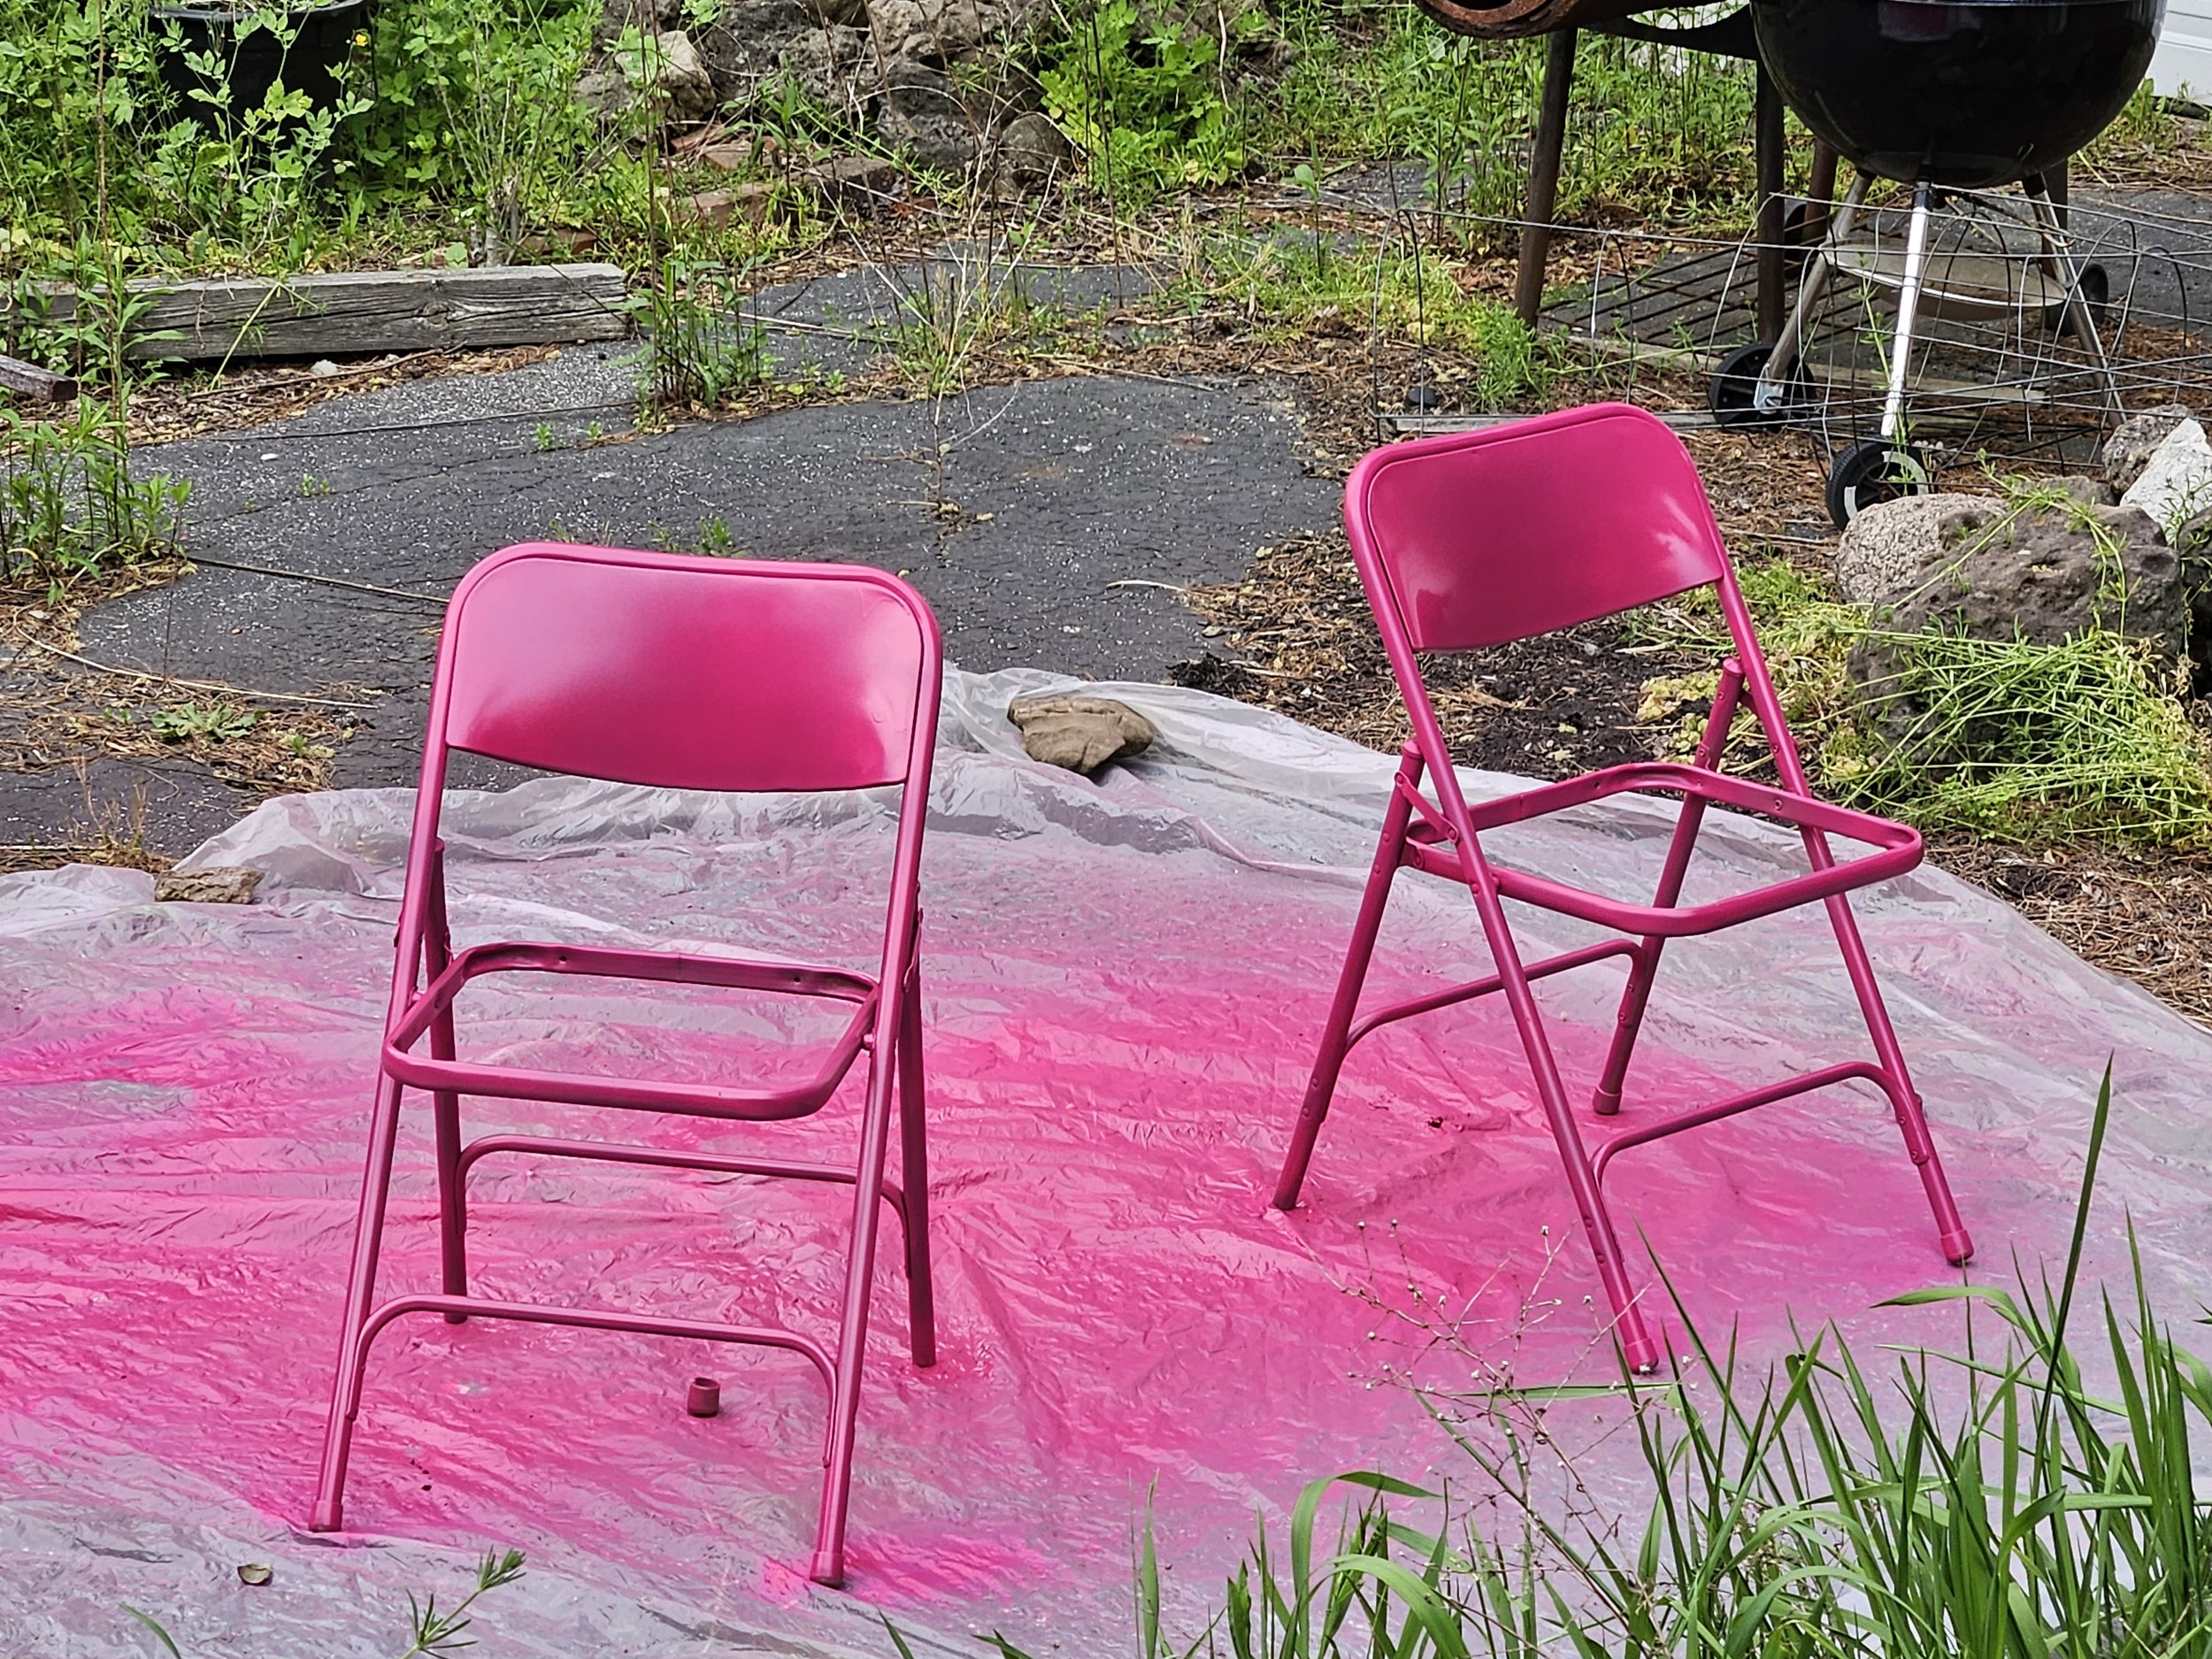
First, make sure your chairs are free from dirt, dust and cobwebs. Then remove the screws holding the padded seat (and backrest, if applicable) in place. Set padded parts and screws aside.
Also remove any broken leg tips before painting. You may want to just remove them all, so they all match. I forgot to do this step, so I now have new tips only on the back legs where they were missing. I didn’t want to remove the front tips after I painted and run the risk of chipping the paint or having the new tips not cover all of the unpainted area.
Outside, on a drop cloth (unless you want a pink driveway or grass), put two coats of paint on the chairs following the directions on the can of paint. This actually took four steps since I had to flip the chairs upside down to cover all areas with the chairs open. I allowed the paint to dry for 20 minutes between each step.

The next step is to cover the padded chairs. I cut two pieces of oilcloth, one for each chair and large enough to wrap around and under the seats, with about 2” - 4” beyond the bottom edge of the chair. This extra will get trimmed away later, but you will need it to pull the fabric taunt before stapling. You may want to play with the placement of the design on the seat front so you don’t end up with a major motif off to the side and all background in the center. Check all of this before cutting any of your fabric!

With the oilcloth face down on the table, lay the seat on top so that the bottom of the seat is facing up. Pull the edges of the oilcloth around to the bottom of the seat and staple in place. To get the oilcloth taunt, staple the opposite sides first in the center. Staple one side, then stretch and staple the opposite side. Repeat this step on the top and bottom.
After you have a staple on each side and the top and bottom of the cushion, you can work around one corner at a time. Do the center of opposite corners first, stretching to make taunt. Then complete each corner always pulling to eliminate pleats. More staples are needed on the corners. Your goal is to get a nice smooth corner with no pleats.

When you come to the bracket that holds the screws to attach the seat to the chair frame, you will need to trim away some of the extra fabric. Be sure you don’t cover the bracket screw holes.
Add some extra staples on each side.
After you have attached the oilcloth all of the way around the seat, you can trim the excess fabric and discard it.

Now you are ready to attach the seats to the chair frame when it is completely dry. It may be a good idea to paint the frames in the evening and let them dry overnight before re-attaching the upholstered seats.
After you are done attaching the seats, put a rubber leg tip on any legs that need a new tip. And voila! You have two pretty, bright and colorful chairs for your office, studio, kitchen or patio.
Stop by the studio this weekend for my Grand Re-Opening, Friday and Saturday, May 19 and 20, from 10 a.m. - 4 p.m. and see the chairs in person. I have lots of oilcloth for sale, if you want to try this at home.
Grand Re-Opening
See all of the new fabrics and patterns at Quilting with Margaret, Studio #265 at 100 Boxart St., on Friday, May 19 and Saturday, May 20, 10 a.m. - 4 p.m. for the Grand Re-Opening. There will be refreshments and door prizes. Come check out my new location!

After 10 years at the Hungerford, Quilting with Margaret has moved to the Charlotte neighborhood at 100 Boxart St., Studio #265. The boxes are nearly unpacked, the new and larger studio shop is all set up, so it is time for a Grand Re-Opening!
See all of the new fabrics and patterns at the new Quilting with Margaret, Studio #265 on Friday, May 19 and Saturday, May 20, 10 a.m. - 4 p.m. for the Grand Re-Opening. There will be refreshments and door prizes. Come check out my new location!
Find the new studio off of Lake Avenue on Boxart Street, the road leading to Turning Point Park. Follow Boxart Street and go straight at the stop sign at the bottom of the hill (behind Charlotte Appliances), into the large parking lot at Boxart Business Park. Enter the building through the double glass doors and go up the steps to the second floor and turn left . Go through the open door leading into the large hallway and turn right. Quilting with Margaret is down the hall and just around the corner.
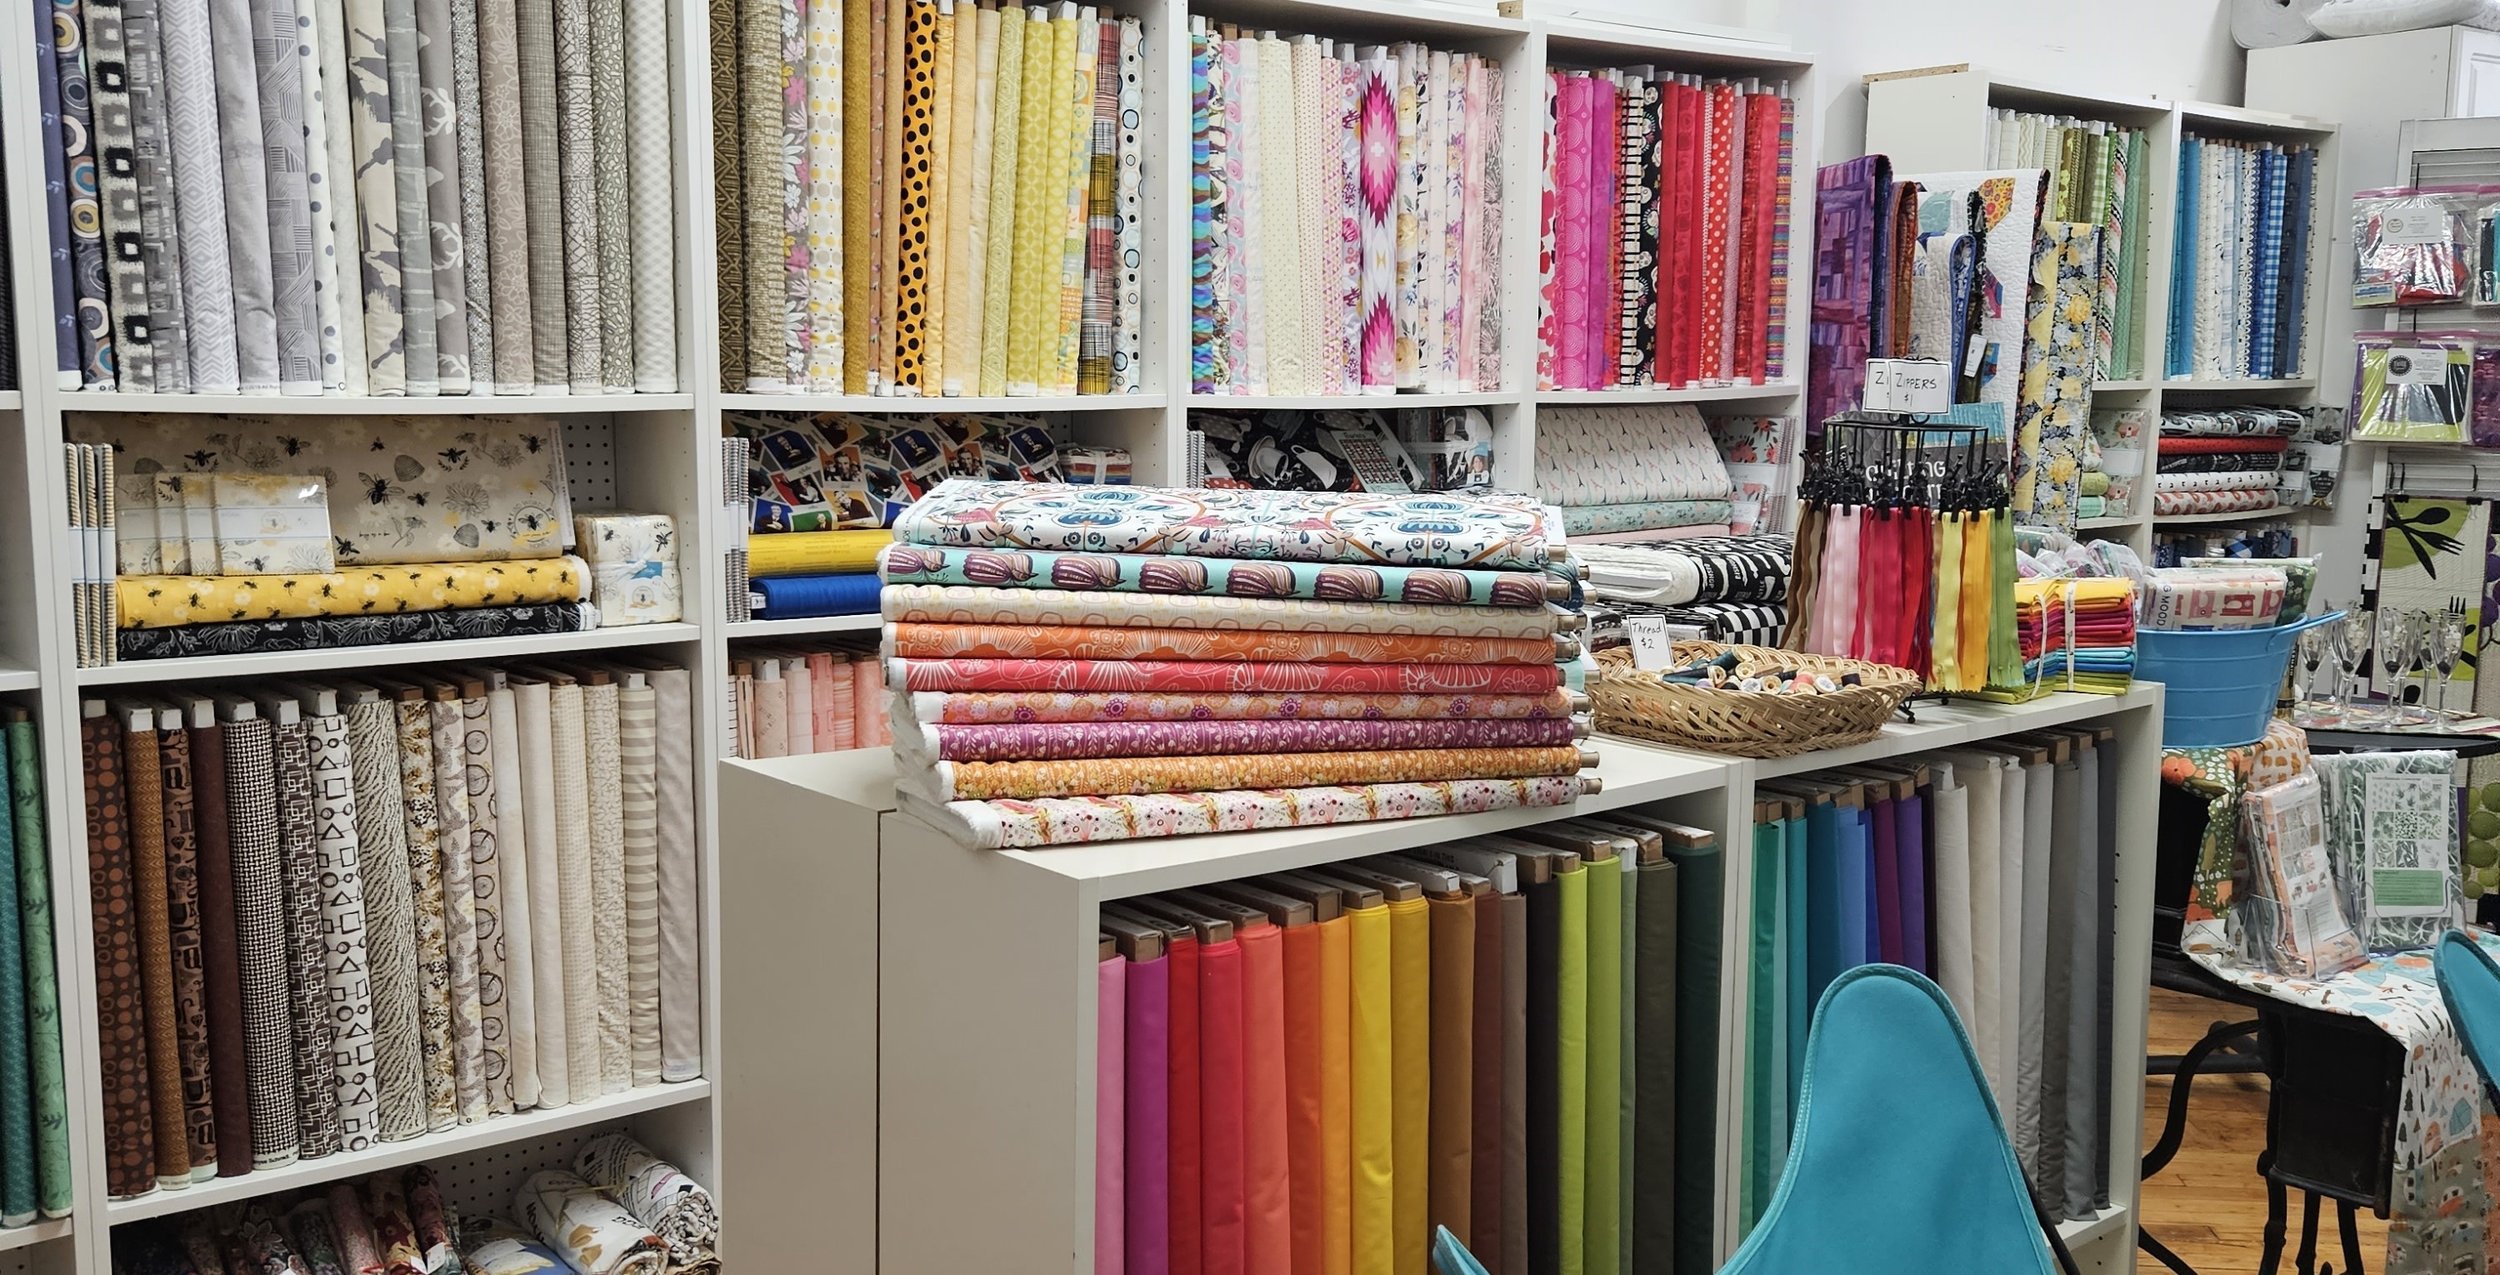
The studio is stocked with a huge selection of solid color fabrics from Paintbrush Studios and Art Gallery Fabrics. You will also find new print collections and precuts from Riley Blake Fabrics. And just in, the entire line of Eastlyn Souk, Exotic Splendor, Love Confessions and Finch & Fern all from Midwest Textiles. Also, brand new at the studio shop are Midwest Textiles Kwik Kits, which are ready-to-sew kits which include pre-cut fabric for an easy to sew quilt top, pattern, backing and binding fabric. In addition, you will find pre-cut fat quarter sets, 5” and10” square sets and jelly rolls which include the entire line of several Riley Blake and Midwest Textiles fabrics, like “Coffee Chalk,” “Mr. Rogers Neighborhood,” “Honey Bee, Saturday in Paris,” “She Who Sews,” “Vintage Deluxe,” “Market Fresh” and more. There are also coordinating by-the-yard fabrics for borders and backings.
Also just in are new $2 Rose Card patterns from Villa Rose Patterns and new modern patterns from Missouri Star Quilts. Plus you will find a large selection of modern quilt patterns from various other companies.
I also have a huge selection of oil cloth fabric by-the-yard in bright and colorful prints. Oil cloth is perfect for all of your summer decorating needs, like picnic tablecloths and deck pillows. I also have D.I.Y. kits of this easy-to-so fabric to make reversible placemats, tote bags, coin purses and mini notebook covers. Other craft fabrics available at the studio shop include chalkboard fabric and Kraft-tex (a leather-like paper fabric). Kits for D.I.Y. projects are also available for Kraft-tex wallets and ear bud cases, wine bags, embellished tea towels and cork fabric clutch purses.
Quilting with Margaret is the place to go to find modern quilt patterns and fabrics. I can’t wait for you to stop by my “happy place” and feel the creative vibes!

Making the News
Quilting with Margaret is making the news! There is an article about my business, new studio and annual Get-Away Weekend in the March/April issue of 55 Plus Magazine. You can find this magazine, for free, near the newspapers at your local Wegman’s store.

Quilting with Margaret is making the news! There is an article about my business, new studio and annual Get-Away Weekend in the March/April issue of 55 Plus Magazine. You can find this magazine, for free, near the newspapers at your local Wegman’s store.
The article includes some photos from last year’s Get-Away Weekend at Beaver Hollow in Java Center, NY. Photo credits to Karen Schiely.
If you have never attended one of my retreats this would be the perfect year to join us. We have a few spaces left, but you need to register before the end of March.
After several years of “staying home,” this year’s retreat is being greatly anticipated. We did have a Covid-safe retreat last year, but this year will be more expanded and more like previous Get-Away weekends.
Don’t worry if you are not a quilter. We always have retreaters join us who don’t quilt, but just want a relaxing weekend away with other creatives. You can bring whatever project you choose to work on. But I will provide a free pattern and instructions for an easy quilt project, if you would prefer to do that.
This will be our 16th year of getting away. Hope you can join us!
2023 Get-Away Project
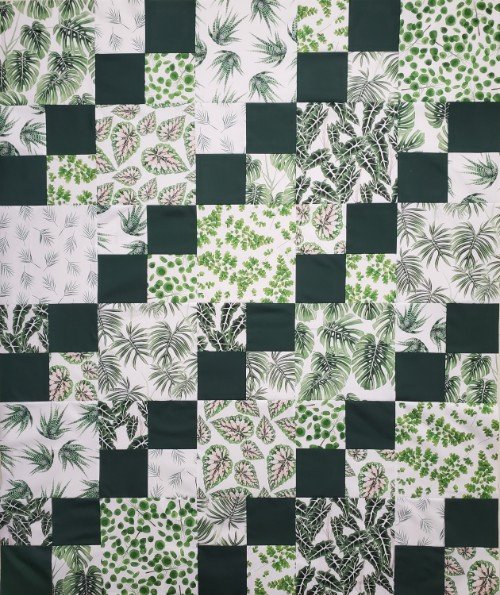
Here’s the guided project for this year’s Get-Away Weekend. It is a Villa Rosa Pattern that is fat-quarter and 10”-square friendly.
The quilt measures 45” x 54”, so it would make a great lap quilt, wall-hanging or even a baby or kid quilt.

2023 Get-Away Guided Project 45” x 54”
The Get-Away Weekend is just a few months away and I finally decided on the guided project for 2023. The pattern we will be using is fat-quarter friendly, but you can also use a coordinating 10” square set. The pattern requires 8 coordinating fat quarters or 23 coordinating 10” squares. You will also need 5/8 yard of a contrasting accent fabric and 1/2 yard binding fabric.
I have lots of Riley Blake fat quarter sets at the studio to choose from. Also, you could choose one of the many Paintbrush Studio Flat Fat Stacks, which are coordinated fat quarters all printed on one continuous piece of fabric. I used an 8-piece Flat Fat Stack called “Modern Botanicals” for the sample and then chose a dark green solid for the accent and binding fabrics.
You can also choose your own combination of eight fat quarters from your stash or select eight fat quarters from the large selection I have at the studio. Plus you will find a selection of 10” square sets in many novelty themed fabrics from Riley Blake at the studio.
This pattern is easy enough for a beginner, but also a fast and fun project for the more experienced quilter. It’s a pattern from Villa Rosa Designs called “Kalinda.” Everyone attending the Get-Away will receive the pattern for free at the retreat.
Stop by the studio to see the sample. All of the bolted fabric is currently on sale for 40% off, so it would be the perfect time to pick up your accent fabric and backing fabric. I will be open on Second Saturday, January 14, 10 a.m. - 3 p.m. and by appointment after that.
If you haven’t signed up for this year’s Get-Away Weekend, there is still time. Just print the signup brochure, fill it out and mail it with a $200 deposit to hold your space. Lots of new people will be joining us this year. It should be a fun and creative weekend as always. If you have any questions, give me a call.